Accessible Ball Launcher
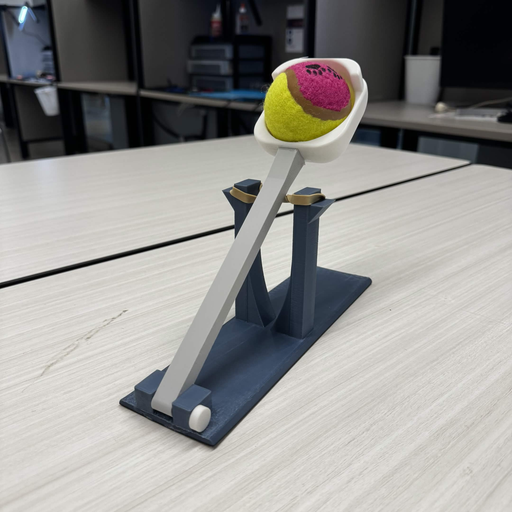
A rubber-band powered ball launcher designed with a client, Mark, so he could keep playing fetch with his dog Rosie — engineered from scratch through four prototype generations to a simple, low-cost, armrest-mountable final design.
01 Project Narrative
This project introduced me to the limitations that people with disabilities face in everyday life, and gave me the chance to work with a real client — Mark — to design something that would let him keep playing with his dog. My team focused on a device that could launch a ball using nothing but rubber bands for power. Through several rounds of prototyping and testing, we arrived at a final design that did exactly that.
02 Team's Work & Personal Contributions
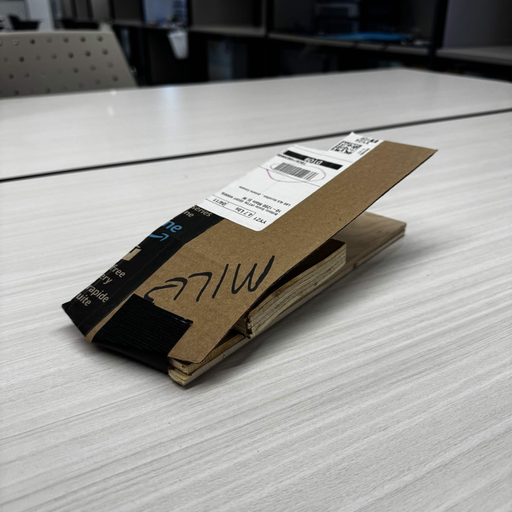
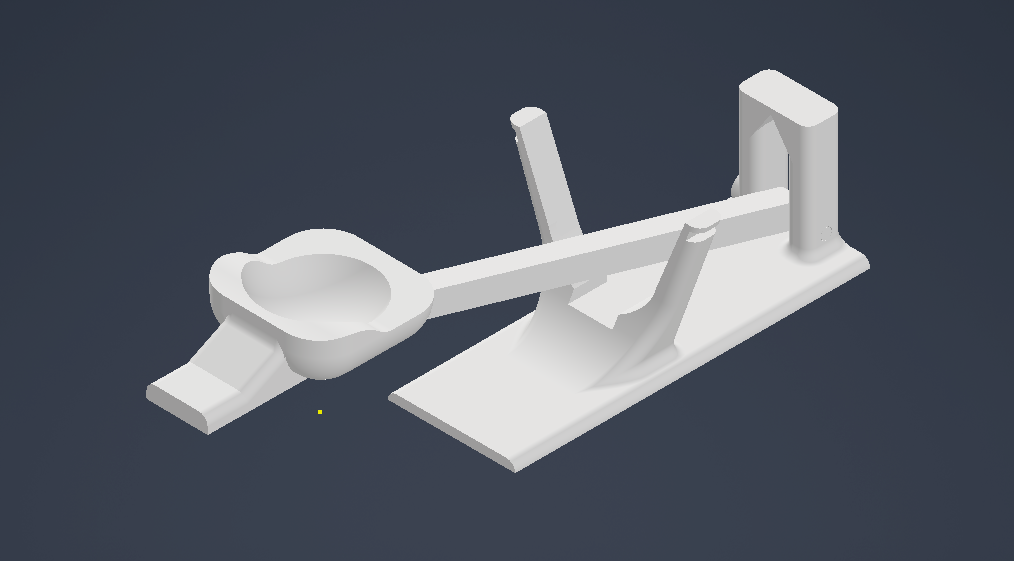
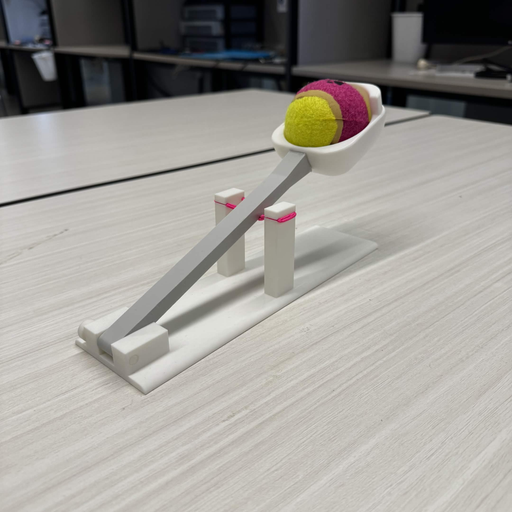
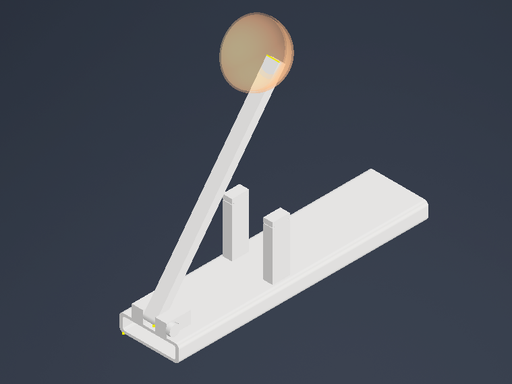
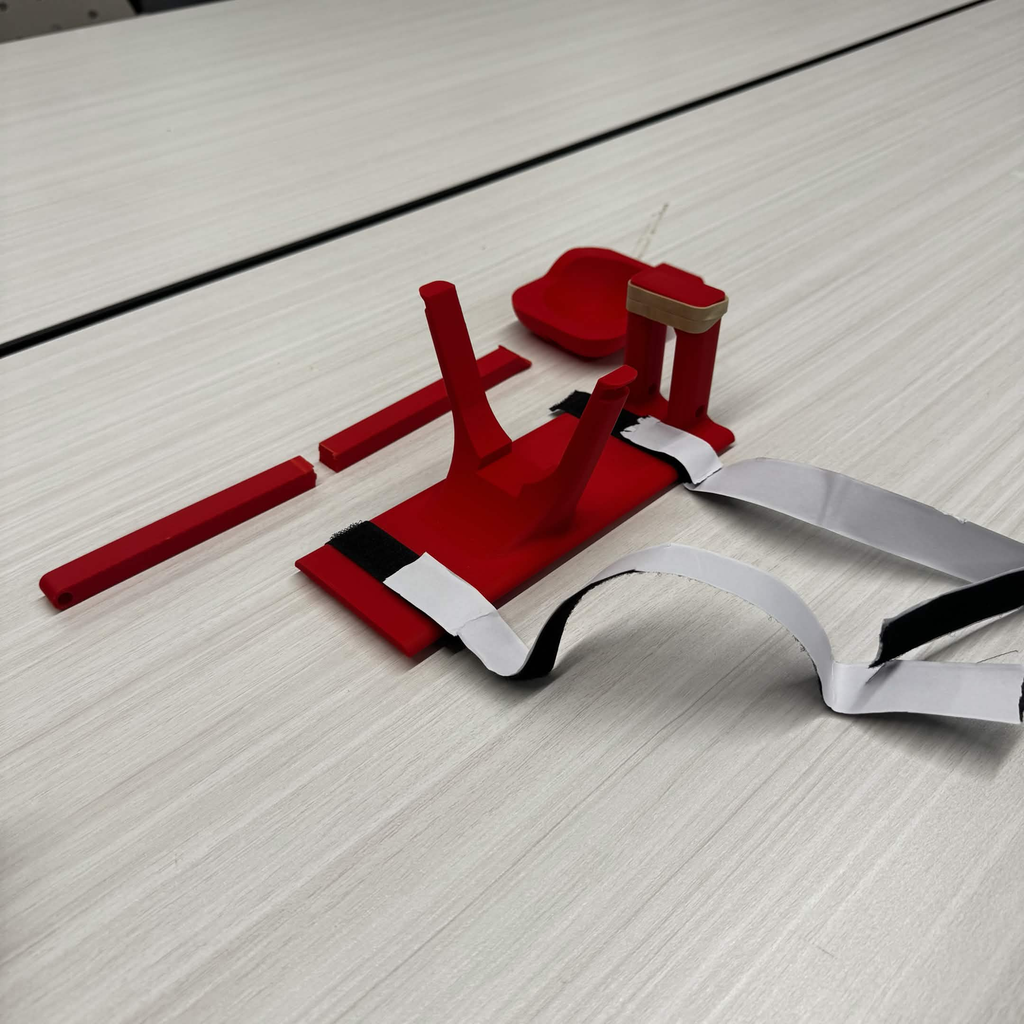
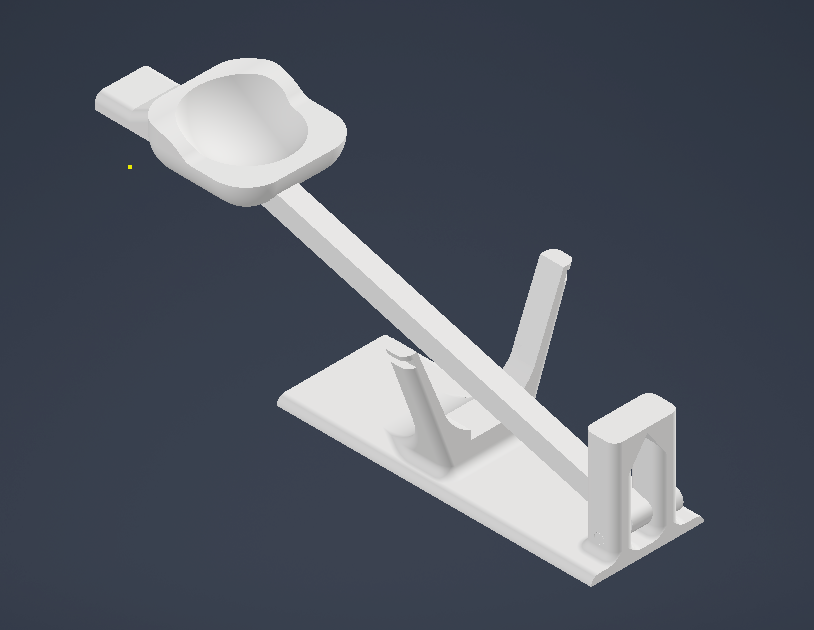
As a team, we generated ideas, defined problem statements, objectives, and constraints, and worked through potential failure points for each design before committing to it. During planning, my idea of using rubber bands to generate launching force was the one the team gravitated toward. I handled most of the prototyping — turning the team's sketches and ideas into CAD, presenting them back to the group, and revising based on feedback. The testing plan was split evenly across the team, covering strength, size, and cost. The prototypes below trace our attempts to launch the ball further by increasing the elastic potential stored in the rubber bands.
Some additional contributions outside of CAD and testing:
- Sourcing supplies — rubber bands, velcro, and test balls
- Keeping the team on track with deadlines and submission dates
- 3D printing the prototypes, including printing off-campus when we fell behind schedule
- Contributing to the final project report
03 Decision Making
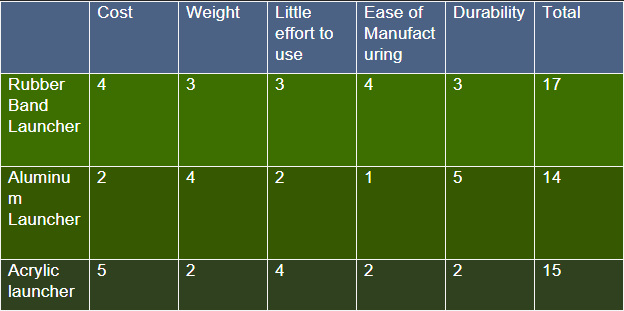
All major decisions were made as a team using decision matrices — every design idea was scored against the criteria that mattered most for Mark's use case.
04 Testing Plan
Our testing plan was effective at surfacing exactly where the design underperformed. These were the criteria we tested against and fed directly into the next prototype:
- Launch distance ≥ 5 m (Objective)
- Max width of 8 cm so it fits on a regular armrest (Constraint)
- Withstands max force for 5 seconds — arm pressed down and held, tested for deformation (Objective)
- Operable with an elbow — to verify accessibility for users without full use of their hands (Objective)
- Total cost under 5 CAD, to stay within the project's material budget (Constraint)
05 Challenges
The main challenge was a lack of strength in the arm. Under repeated load from the rubber bands, the generic PLA arm showed significant elastic deformation, which eventually became plastic deformation — and the arm would break. We tried a shorter version, a thicker version, a denser version; none held up well. Part of the problem was structural: the ball holder had to be glued to the arm because our printer couldn't print the whole piece in one pass, which left a weak point exactly where the user applied force and the rubber bands pulled back.
Other challenges I ran into personally:
- CAD software bugs (Inventor) — files corrupted repeatedly despite using separate folders per prototype; parts would corrupt after editing a copy; assembly files routinely lost constraints on save.
- 3D printing logistics — commuting to campus made it hard to print on my own schedule, forcing rushed, lower-quality prints. Our allotted 2 hours of printing time was often not enough for a full prototype, and two failed prints cost us even more time.
- Time management — working a job in Mississauga while commuting to McMaster daily made it difficult to protect work hours and project deadlines at the same time.
06 Reflection
What?
The most important decision came right at the start: choosing the energy source for launching the ball. We had to weigh Mark's mobility and strength against options like a spring, a powered motor, or pressurized air. We chose rubber bands for simplicity and low cost — a choice that also let the user tune launch strength just by adding or removing bands, keeping the design affordable to maintain. Early testing showed simple rubber bands across two pillars weren't enough force to clear 5 m, so we redesigned to allow more bands at once and to keep them more stretched at rest, significantly increasing stored energy. After a prototype that broke, one that launched downward instead of forward, and one that barely launched at all, we reached a final version that cleared 5 m, launched high, and stayed simple: four parts total, easy to mount on the chair, and cheap to maintain.
So What?
This project taught me that idea generation matters more than execution speed. We could have picked a rough concept and started prototyping immediately, only to find it too hard to iterate on, too expensive, or simply broken. Instead we prioritized planning over building, staying patient until we'd considered the real alternatives before touching a printer. That patience saved us time and effort we would have otherwise lost to a weaker design. I think more planning time could have pushed the design even further, but we were working against a hard deadline — and within that constraint, I believe we addressed every issue our testing plan surfaced.
Now What?
The planning stage is the foundation a design's success is built on. That's an easy thing to forget under time pressure, when the instinct is to start prototyping before you've actually finished thinking through the problem. On the next project I'm handed, I want to give myself the space to plan a solution properly before I start building — rather than letting the clock push me into premature prototypes.